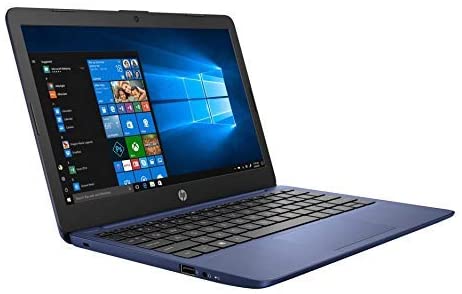
5.2.6. Laptop
My preferred operation system is a Mac. However in the radio world it seems that Mac doesn’t cover my requirements. Yes I could run a virtual windows inside my Mac, however somethings don’t work as they need direct access to USB interfaces etc. I also don’t want to carry a super expensive laptop while working outside.
I was looking around Amazon for a low cost laptop, I was bugeting for around £150 and came across an HP Stream 11. It has 4Gb RAM and 64GB storage.

It came with Windows 10 s edition installed. So the first thing was to change that to a full windows version, this was very simple and just required logging into Microsoft store and selecting the upgrade (It’s free).
I would now go ahead and install all my radio applications, Chirp, Logger32, Anytone CPS, WSJX, etc, etc.
5.2.6.1. Dual Booting
I would also like a linux on it as well. I was going to install Ubuntu, however in this case I chose Kali linux as it has lots of the utilities that I want to use for pen testing.
64Gb Isn’t really big enough to split and dual boot. I could always use a USB stick and boot from that. However the HP Stream as a Micro SD slot, so I thought it would be much better to install linux on that. So I installed a 128Gb micro SD card.
By default the laptop is set to only boot from the internal disk and via UEFI.
While in windows I modified the drive partition table to split the windows partition, this new partition is just big enough to store the linux kernel and vmimage. 1Gb is plenty of space.
5.2.6.1.1. Setting the BIOS
We need to change the BIOS configuration to allow booting from a USB stick so I can install the linux. Power on the laptop and keep pressing “ESC” until the boot menu appears. From here you can select BIOS configuration.
Under the System Configuration options, select “Boot Options”. You need to enable “Legacy Support”. Save changes, and reboot. On reboot you’ll get a screen asking you to confirm legacy boot support by entering a 3 digit code. Once this is complete you should be able to boot from the USB stick with your required OS.
With the USB stick installed, Pressing “ESC” again during next boot you can select the boot menu and then select a boot device.
During the Linux install, when it gets to the disk layout, select manual layout. I created a single partition on the 128Gb micro SD card. Once the install is complete, boot again into the USB stick, and select recovery mode.
We need to start a shell on the micro SD (Rather than in the installer). Format and mount the partition on the internal storage, using gparted.
gparted /dev/mmcblk0p5

mount /dev/mmcblk0p5 /mnt

# Copy the contents of /boot to /mnt
cp -r /boot/ /mnt
We can now add these two entires to the /etc/fstab file
# /etc/fstab: static file system information.
#
# Use 'blkid' to print the universally unique identifier for a
# device; this may be used with UUID= as a more robust way to name devices
# that works even if disks are added and removed. See fstab(5).
#
# systemd generates mount units based on this file, see systemd.mount(5).
# Please run 'systemctl daemon-reload' after making changes here.
#
# <file system> <mount point>   <type>  <options>       <dump>  <pass>
# / was on /dev/sdb1 during installation
UUID=05dde5ed-7cab-49cd-8c8f-e7ccfa931de8 /               ext4    errors=remount-ro 0       1
UUID=2e015c10-e94b-48f1-9c7a-8a38008e35a1 /boot           ext4    errors=remount-ro 0       1
# /boot/efi was on /dev/mmcblk0p1 during installation
UUID=C4C3-636C  /boot/efi       vfat    umask=0077      0       1
# swap was on /dev/sdb2 during installation
UUID=63313e11-ac6c-422c-90f8-693fe440a983 none            swap    sw              0       0
finally mount all these partitions to the filesystem, and install grub again. This will update the boot files, and allow the system to dual boot windows and linux.
Once the install is complete, you should be able to remove the USB stick and enter the BIOS again, this time changing the boot order to select the linux as first. The linux boot manager should have already found the windows partition and how offer the choice during boot.
